Eleanor Rose Home: DIY Antique Mirror
Do you love the look of an antique mirror but have never found one that you really love? No worries, you can create your own!

One of the many things I search for when we go thrifting are antique mirrors. You know the ones that have a beautifully distressed mirror framed in a gorgeous old, vintage frame? Needless to say, my searches have never yielded me the antique mirror I’ve had pictured in my mind. So, instead of continuing my endless search, I decided to make my own…with a little help from hubby of course!

To start, I found an old, framed piece of art at our local antique store. I fell in love with the frame, but the art not so much. I knew the frame and the glass would fit perfectly in this little wall in our entryway. I purchased the framed art for about $20.

For this project, if you have a frame, you love but no glass you can purchase a piece of glass cut to fit your frame from a local hardware store or glass company.

After doing a little research online I found a simple and easy method to transform glass into an antique mirror. Let’s do it!
What You Will Need to Antique Glass
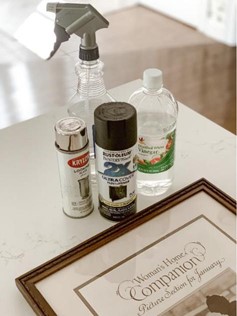
- Frame & Glass
- Distilled White Vinegar
- Clean Spray Bottle
- Krylon Looking Glass Spray Paint
- Matte Black Spray Paint
- Lint Free Cloth
- Prepare the Frame & Glass
We peeled the paper backing from the back of the frame very gently. The frame we purchased was old, so we were careful not to damage the frame. We removed the matting, artwork, and glass.
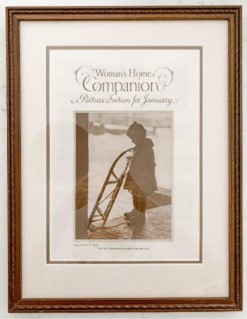
At this point, you could paint the frame if you like. Or, you could add a little Rub n’ Buff if you wanted a gold frame and purchased a brown one like mine. I loved the warm brown tone of our frame, so we opted to leave it as is. We did wash it carefully with just a little soap and water to remove any dirt & debris.
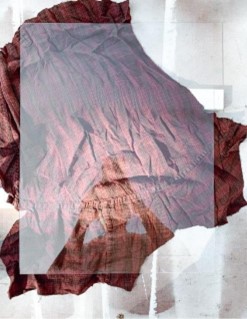
Then we cleaned the glass we removed from the frame. You could use Windex or vinegar to clean the glass. Just make sure there are no streaks on the glass when done, as this will affect your finished product.
- Spray on Black Paint
On one side of the glass, paint it with the black spray paint. The black will show through all the semi-transparent spots so make sure you give the glass a nice coat of black paint (not too thick though). Allow the black paint to dry completely before moving onto the next step.
- Spray on Vinegar
Once the black spray paint is dry, flip the glass over.
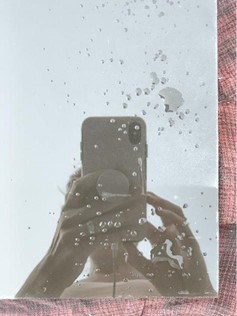
We purchased a spray bottle (with a fine mist) and sprayed a mist of distilled white vinegar on the glass. I focused the vinegar mist on the outer edges for a realistic antique mirror look. I also added some random, larger droplets throughout. I made sure the vinegar spray looked natural and organic so that the mirror would appear as if it has aged naturally through the years.
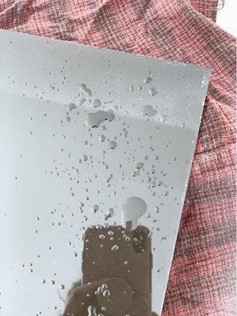
Dab any droplets that are too large or that you don’t like with a lint free cloth. Or wipe the entire surface of glass to remove all of the vinegar and add your spray and droplets again.
- Spray on Mirror Paint
Spray the mirror paint directly over the vinegar, with several thin coats making sure all of the glass is covered.
This paint has a very strong smell, so make sure to do this in a well-ventilated area or wear a mask!
- Dab the Vinegar
This part of the antique mirror process goes fast, so it was nice that Dave and I worked on this together.
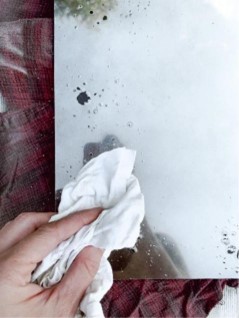
The mirror paint dries very quickly, so give it a couple of seconds to dry, and then using a lint free cloth, lightly dab up the vinegar on areas where you want to distress the mirror paint. This is the tricky part! Dabbing the vinegar immediately on wet paint removed the mirror effect completely and dabbing the paint too late leaves a spotty finish.
You may need to try a few times to get the antique mirror result you like (continue reading for how to remove the mirror finish). It took us 4-5 tries to get the antique mirror result we liked.
Removing Mirror Finish
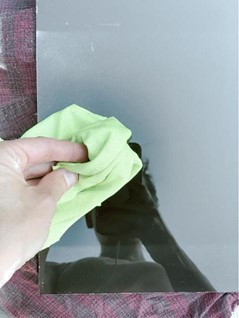
If you don’t like how the mirror finish turned out, redoing the same piece of glass is easy! Spray the mirror side of glass with a decent amount of Windex. Then scrub the finish off with paper towels, working until all of the mirror finish is removed. Again, we did this 4-5 times, and the mirror finish came off the glass easily each time.
- The Final Step
Once your mirror is done and you are happy with the result, it’s time to hang it!
Now, you could hang your mirror from a normal everyday sawtooth hanger, but I decided to add a fun, whimsical detail to our mirror by hanging it from ribbon. I love using ribbon in our home décor, it adds another layer of depth and texture that I can’t get enough of.
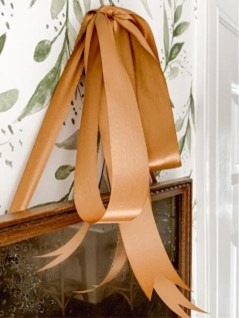
To hang your mirror from ribbon, add eye hooks to the top left and right sides the mirror. Eye hooks simply screw into the wood frame, so they are very easy to use. Grab your favorite ribbon and thread one piece through the left eye hook and another ribbon through the right eye hook, then tie the ribbon in a knot around each of the eye hooks. Meet the other ends of the ribbon in the center of the mirror and tie into a knot (make sure the knot is centered otherwise your mirror will hang crooked).
Also, where you tie your knot in the ribbon will depict how low or high your mirror with hang. Take that into consideration as well when tying your knot in the ribbon. Hang the ribbon from a nail. Then take another length of ribbon and tie that into a bow around (and covering) the nail. Trim the ribbon tails so that they are at your desired length.
How pretty is that?!
Don’t forget, you could change the ribbon seasonally…which is exactly what I will be doing!
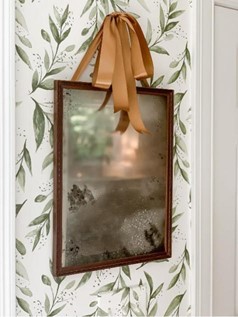
This DIY was super easy, inexpensive, and honestly, I wish we had done it sooner. The entire project took us about an hour from start to finish and was easier than we anticipated. The result is a gorgeous mirror that looks like it’s been around for ages. I love having a mirror hanging in our entryway.
Why have we not hung a mirror here before?!

by Heidi Samia


